Mini microwave stand

My daughter Bailey moved out on her own earlier this year and has been slowly but surely getting her living space together. She has a small kitchen and until recently has been putting her microwave on a chair, so with Christmas coming it was a good chance to build her a cart/stand to take care of that and give her a little more storage. I designed it to be as small as it could be to fit her microwave in order to preserve as much kitchen floor space as possible.

It's small, but it still didn't fit under the tree. I'm going to add a shelf once Bailey decides on what she wants to store in it.

Dovetailed drawer detail.

Ready for nuking!

Craftsman screen door

As I mentioned in the previous post my latest project is a custom screen door for Stacy Bolt, a fellow veteran of advertising (and creative partner of mine way back when) and author of Breeding In Captivity, the story of her 'journey to have a child at “advanced maternal age,” first with the help of a Really Expensive fertility specialist, and then ultimately through a local adoption agency.' Read it, it's really great.

Now where was I? Right, screen door...

Stacy and her husband Dave (oh what the hell, I'll unseasonably pimp his incredible haunted house Fright Town while I'm at it. Yes I am very well connected!) have a beautiful old craftsman home with an unusually wide front door. Since standard sized screen doors are out of the question Stacy asked me to design one to fit her house. We'll test fit it this weekend (did I mention that the door opening of this 100-year-old house is somewhat less than square?) and then adjust, put stain on and finish on it. Here are the latest in progress photos.

That grand old door.

Plans. I ended up changing the mortise and tenon joints that connect the bottom, top and side pieces to lap joints for extra stability on this wide door. I'll put some square pegs through the joints for added strength.

Plans. I ended up changing the mortise and tenon joints that connect the bottom, top and side pieces to lap joints for extra stability on this wide door. I'll put some square pegs through the joints for added strength.

Mortise and tenon joinery for the inner framework.

Cutting the mortises.

DXS stands for Dave/Xander/Stacy. The X is biggest because their son Xander is the most important person in the house.

DXS stands for Dave/Xander/Stacy. The X is biggest because their son Xander is the most important person in the house.

Dry fitting to check the joinery before glue up.

Glued and ready to finish.

November: Yee-Haw!

Just a rainy day in the shop cutting joints for a screen door that I need to get finished by Thanksgiving for a client. Apparently turkey day really brings the heat at their house so they need to be ready to throw open the front door for some ventilation. The front door of which I speak is much wider than normal (100 year old house) so they needed a custom built screen door since they can't find one ready-made anywhere. I came up with an Arts & Crafts design (the plan is somewhat visible in the third photo) and it will include a monogram of the family members' first initials on a curved cross piece in the middle. Many more pieces to cut but I now have a frame.

Planing the rough stock.

Dang near forgot to flip the calendar to November. Better late than never.

Sushi

A nice break from all the rantings and other general nonsense on Facebook today was to see a couple of pictures that Carla Asplund posted of her homemade sushi on a serving set that I made. The sushi looks great. Well done Carla.

Reminds me that I need to post pictures of some of the other sushi sets I've made. And then eat some sushi. That salmon looks really good.

Tool rehab fun time

As I documented in a post earlier this summer I returned from a cross country trip, starting at my in laws in upstate New York, with a moving truck full of hardwoods and tools. I've spent my free time (what free time?) the last few months sorting through everything and finding places for it in my shop. Now that I'm getting things organized I've begun work restoring some of the hand tools that had corrosion from being in a basement the last couple of years. Kind of a zen process really, to settle in with a fire burning in the woodstove and start putting some sweat into it. I started with chisels and now am almost done with the hand planes. I love rehabbing old/vintage things so this is right up my alley.

There's a nice, shiny chisel under there somewhere.

Making progress. Those big timber framing chisels on the left remind me that I have a dream to build a cabin someday.

One of a couple old Stanley's ready for some TLC. At some point just for kicks I'm going to do a little poking around on the internet to find out what years these were made. There are some good resources out there but the process of identifying Stanley's by year of manufacture looks a little tedious if you're not already a Stanley expert. The big No. 6 planer has very few markings so that's the one that will take the most time to figure out.

Looking better. All the mechanisms still work pretty smoothly after a little machine oil. Very glad about that.

The one on the left has some pretty deep pitting in the iron and chip breaker that I couldn't polish out so I may look for a replacement set if I have trouble with it.

Mid century side table Pt. II (or is it Pt. III?)

I started this so many months back I can't remember which in-progress post # this is. The Jacks table is now all finished except for getting the glass top cut. Now that I have all my routing templates created for this table I'm thinking of building a second to complete the set.

Mid century side table

Finally coming back to a personal project I started several months ago and now am taking time to complete (and make some room in my shop). A little more finessing of the joinery and then I can glue it up and put a finish on. After that I'll ship it up to the vacation house where it will live with it's coffee table sibling.

Cross country wood hauling adventure

After much planning over the last year my kid Reilly and I finally tackled a cross country drive to bring back a moving truck's worth of hardwoods and tools from upstate New York. My inlaws very generously offered my late brother-in-law Patrick's collection of hardwoods to me along with many, many tools. I'm beyond grateful and can only hope to do Patrick proud as he was an incredible woodworker.

Loading the 16 foot Penske with stacks of lumber, burls for turning, clamps, band saw, lathe, jointer and on & on. The truck was a weeee bit overweight when all was said and done.

A cool little treasure that was also tossed into the mix. An early 1900's Stickley rocker in need of restoration and re-assembly.

The Work of L&JG Stickley shop mark on one of the boards identifies this chair as between 1912 and 1920. Can't wait to start work on the restoration.

Rolling with the big boys.

The Dakotas: where you can stand in the middle of the highway taking pictures without getting run over.

Me and the kid in obligatory tourism photos: on the el train in Chicago

 and the Devil's Tower.

3200 miles worth of bugs.

My wife Deirdre still smiling through the unloading process. While we had several people in New York including the superhuman Farmer Bob to help load the truck, it was just Deirdre, the kid and I to unload back home. Much pain was in store the next day.

The superhuman, yet camera shy, Farmer Bob. He can lift a 350 lb band saw (or a 400 lb engine block I hear) and still have a hand free for his beer.

Old Adirondacks

Over the weekend I got a chance to take a look at a couple of Adirondack chairs I built a few years ago. It was nice seeing how they've gotten better with age and that they've been well taken care of.

Frames for Karen Wippich Paintings

A nice mellow Sunday project after a couple of weekends that weren't so mellow. With a nice fire burning in the Man Cottage wood stove on a rainy Portland day, frame making is a nice diversion. We have a couple of small paintings by Karen Wippich and I'm making frames to match the one on a larger painting of her's that we also have. These will be painted in Karen's secret mix of Payne's Gray and Burnt Umber. Oops, I hope that wasn't actually supposed to be a secret. See more of her paintings at karenwippich.com.

I'm also excited to start another cool woodworking project soon in trade for one of Karen's husband Jon's paintings. Can't wait to get cracking on that! Here's a sampling of his work: jonwippich.com

Pinup girl calendar hanger

I finally decided it was time to stop disrespecting the Elvgren pinup calendar that I've been hanging in the shop on a ratty old nail. So grabbed a couple of pieces of scrap walnut and some thumbscrews and created a hanging system. I think Miss March looks just a little happier now, or whatever you call the look on her face. I dunno, now she's just starting to intimidate me...

Dining meets Bowling: the 10th frame

Finally moved into the last stages of finishing the bowling alley table top. Stripping the finish from the top was far easier than expected. The thick, old finish bubbled up and off in one application. The exposed wood looked great other than several repairs needed to secure boards that had ball impact damage. Then it was all about sanding, sanding and more sanding.

Removing the old finish.

After trimming the table down to the width I wanted, I laminated a pair of new maple boards over the exposed sides that were filled with nails and splinters from the tongue & groove joints.

While repairing one of the broken boards I got a good look at a nail that is one of hundreds within the lane.  These are the reason nobody will run your bowling lane through their big expensive planer, a process that would make the flattening and cleaning of the surface much, much faster. Probably for the best actually, because not knowing how thick the inlaid walnut arrows are there could be a danger of planing them completely off. Which would suck big time.

Almost done with sanding. The wood looks really great. I'm really happy about that because when I firs received the lane it appeared that there may be staining from oil between the joints of many boards but thankfully most of that went away when the finish was stripped. Luckily the guy I bought this from kept the lanes neatly stacked indoors. I've heard of nightmare stories of people finishing lanes that had been stored outdoors under a tarp and it it's an ugly process.

Three coats of finish and a light pass with super fine sandpaper to make it super smooth, and now it's all done. I'll have to put it aside for a couple of weeks until I my next trip up to the Puget Sound where it'll be attached to the metal base.

I can't wait to put it all together. It's going to be fun sitting around the table, knowing of all the bowling frames that have been rolled across it in the past.

Laundry room to bunk room pt. 3

Safety rails and a shelf were made in the shop here in Portland and carted up to the Puget Sound for installation this last weekend. I'd like to say that this project is 100% done. In reality it's more like 99.9% done since there is a little trim work left to do. But for all intents and purposes it's ready for a sleepover.

I think I hear the little bathroom behind that pocket door saying "pretty me up next!"

Laundry Room to Bunk Room Pt. 2

With all the dirty work of demolition done and door/window shifted around it was time to move on to putting the room back together. Our electrician ran the wiring for the reading lights and relocated the main room light, then we moved ahead with drywall and painting. Finally, the long-awaited bunk build can begin.

We started with extending out the upper platform to the width of a single bed, then began framing the lower bunk

(Note: I Photoshopped my butt crack out of the above photo to keep the focus on the work).

These are storage compartments where kids can toss their duffel bags and backpacks into when they stay in the bunk room. Our dogs do a little quality assurance check. We pass inspection with two paws up.

The bunks start taking shape.

Locating a ladder that works for both the middle and upper bunks without taking up much space in this small room was a challenge. We considered using a library style ladder with rollers that could move between the bunks, but then it occurred to us that things could go very badly if someone in a sleepy daze found out the hard way that someone had rolled it away from where they expected it to be.

Deirdre gives the ladder and upper bunk a test run.

Next up: Details, safety rails, finishing and done!

Laundry room to bunk room Pt. 1

Here's the first part of a documentary on a laundry room to bunk room conversion. The seed of the idea came from a closet that bumped in from the hallway creating what looked like a loft that would make a nice place for a bed.

The other opportunity was a giant bank of closet space in the kitchen that turned out to have a nook perfectly sized for a stackable washer/dryer set so water and electric was rerouted and the laundry set up relocated.

Demolition begins.

The two major structural things that needed to happen were to move a pocket door over to allow enough width for bunks on one wall, along with lowering the window to make room for the upper bunk. It was a matter of inches here and there to make the whole puzzle work out.

With door and window moved, we're ready to have electrical run for bunk reading lights and begin drywall.

Stay tuned for part 2.

Dining/bowling continued

This is perfect. Advertising League bowling season has kicked off so I can now divide my free time between actual bowling and working on the bowling alley table. Here's the latest progress.

This is the backside. Glue stalactites, iron t-bar braces and rough black-painted boards. The t-bars kept the bowling lane from warping but I'm going to take them off and replace them with iron supports that I'll inset flush with the surface.

Braces removed, black paint stripped and a some time spent with the belt sander to start making the surface a little more even.

Routing out the channels for the new iron braces. Where's all the sawdust you ask? Okay I admit it, I vacuumed things up to make the picture look nicer.

Channels are done, iron braces are all cut and drilled. Pencil marks above show a few more places I need to level before I bolt the braces in.

And that's all for the back side for now.

Now that all the work is done (on the side that no one will ever see) I can flip it over and start stripping the purty side. Can't wait.

Dining meets bowling

An ongoing personal project to craft a dining table is finally taking shape. My first foray into welding was to create a base that would play nicely in a mid century modern styled home and support a beefy wood slab of a top. The result is a trapezoidal base of 1x3 steel tube buffed to a satin finish. There were a lot of subtle angles that ended up adding a bit of complexity to cutting and connecting it all together, but in the end came out really nice.

(*Note: that object in the background is a firewood rack that my wife Deirdre built. Turned out great and she had it powder coated black. I'll post a pic of the finished product soon, firewood and all.)

Deirdre and I hauled the table base up to our house in the Puget Sound and tossed a solid core door on it in the meantime as we search for the ultimate top. The door is actually a pretty decent stand in and we like the light tone of it in the context of the darker woods on the floor and cabinets, which has influenced our thinking about what types of wood species we'd consider.

Up until yesterday we thought we were looking for a live-edge slab when out of nowhere a new possibly came our way thanks to (but sadly) the demise of Hollywood Bowl, one of Portland's long-time bowling alleys. Having been a bowling aficionado all my life and "coach" of an advertising league bowling/drinking team it feels like fate. And having bowled at Hollywood many times over the years, there's at least a good possibility that I have in the past actually rolled some frames on what will soon be our dinner table. Now that I think of it, I rolled my first 200+ game at Hollywood (244!). Now how cool would that be?

This chunk of lane is the head portion made of hard maple with inlaid walnut marks. It also has the occasional ding of many a launched/dropped house ball that add to it's authenticity. The slab was 12' long so I cut it down for transport to roughly the size of what the final top will be, which leaves a smaller 4x5 foot piece for yet another project.  Even cut down, this thing weighs a ton (not literally, but still freaking heavy). I knew I was in trouble when it got loaded on my truck with a forklift but was going to have to unload it by hand when I got back to the shop. Deirdre and I enlisted the help of our scrappy 14-year-old daughter and got it done, but we may be in some pain tomorrow morning.


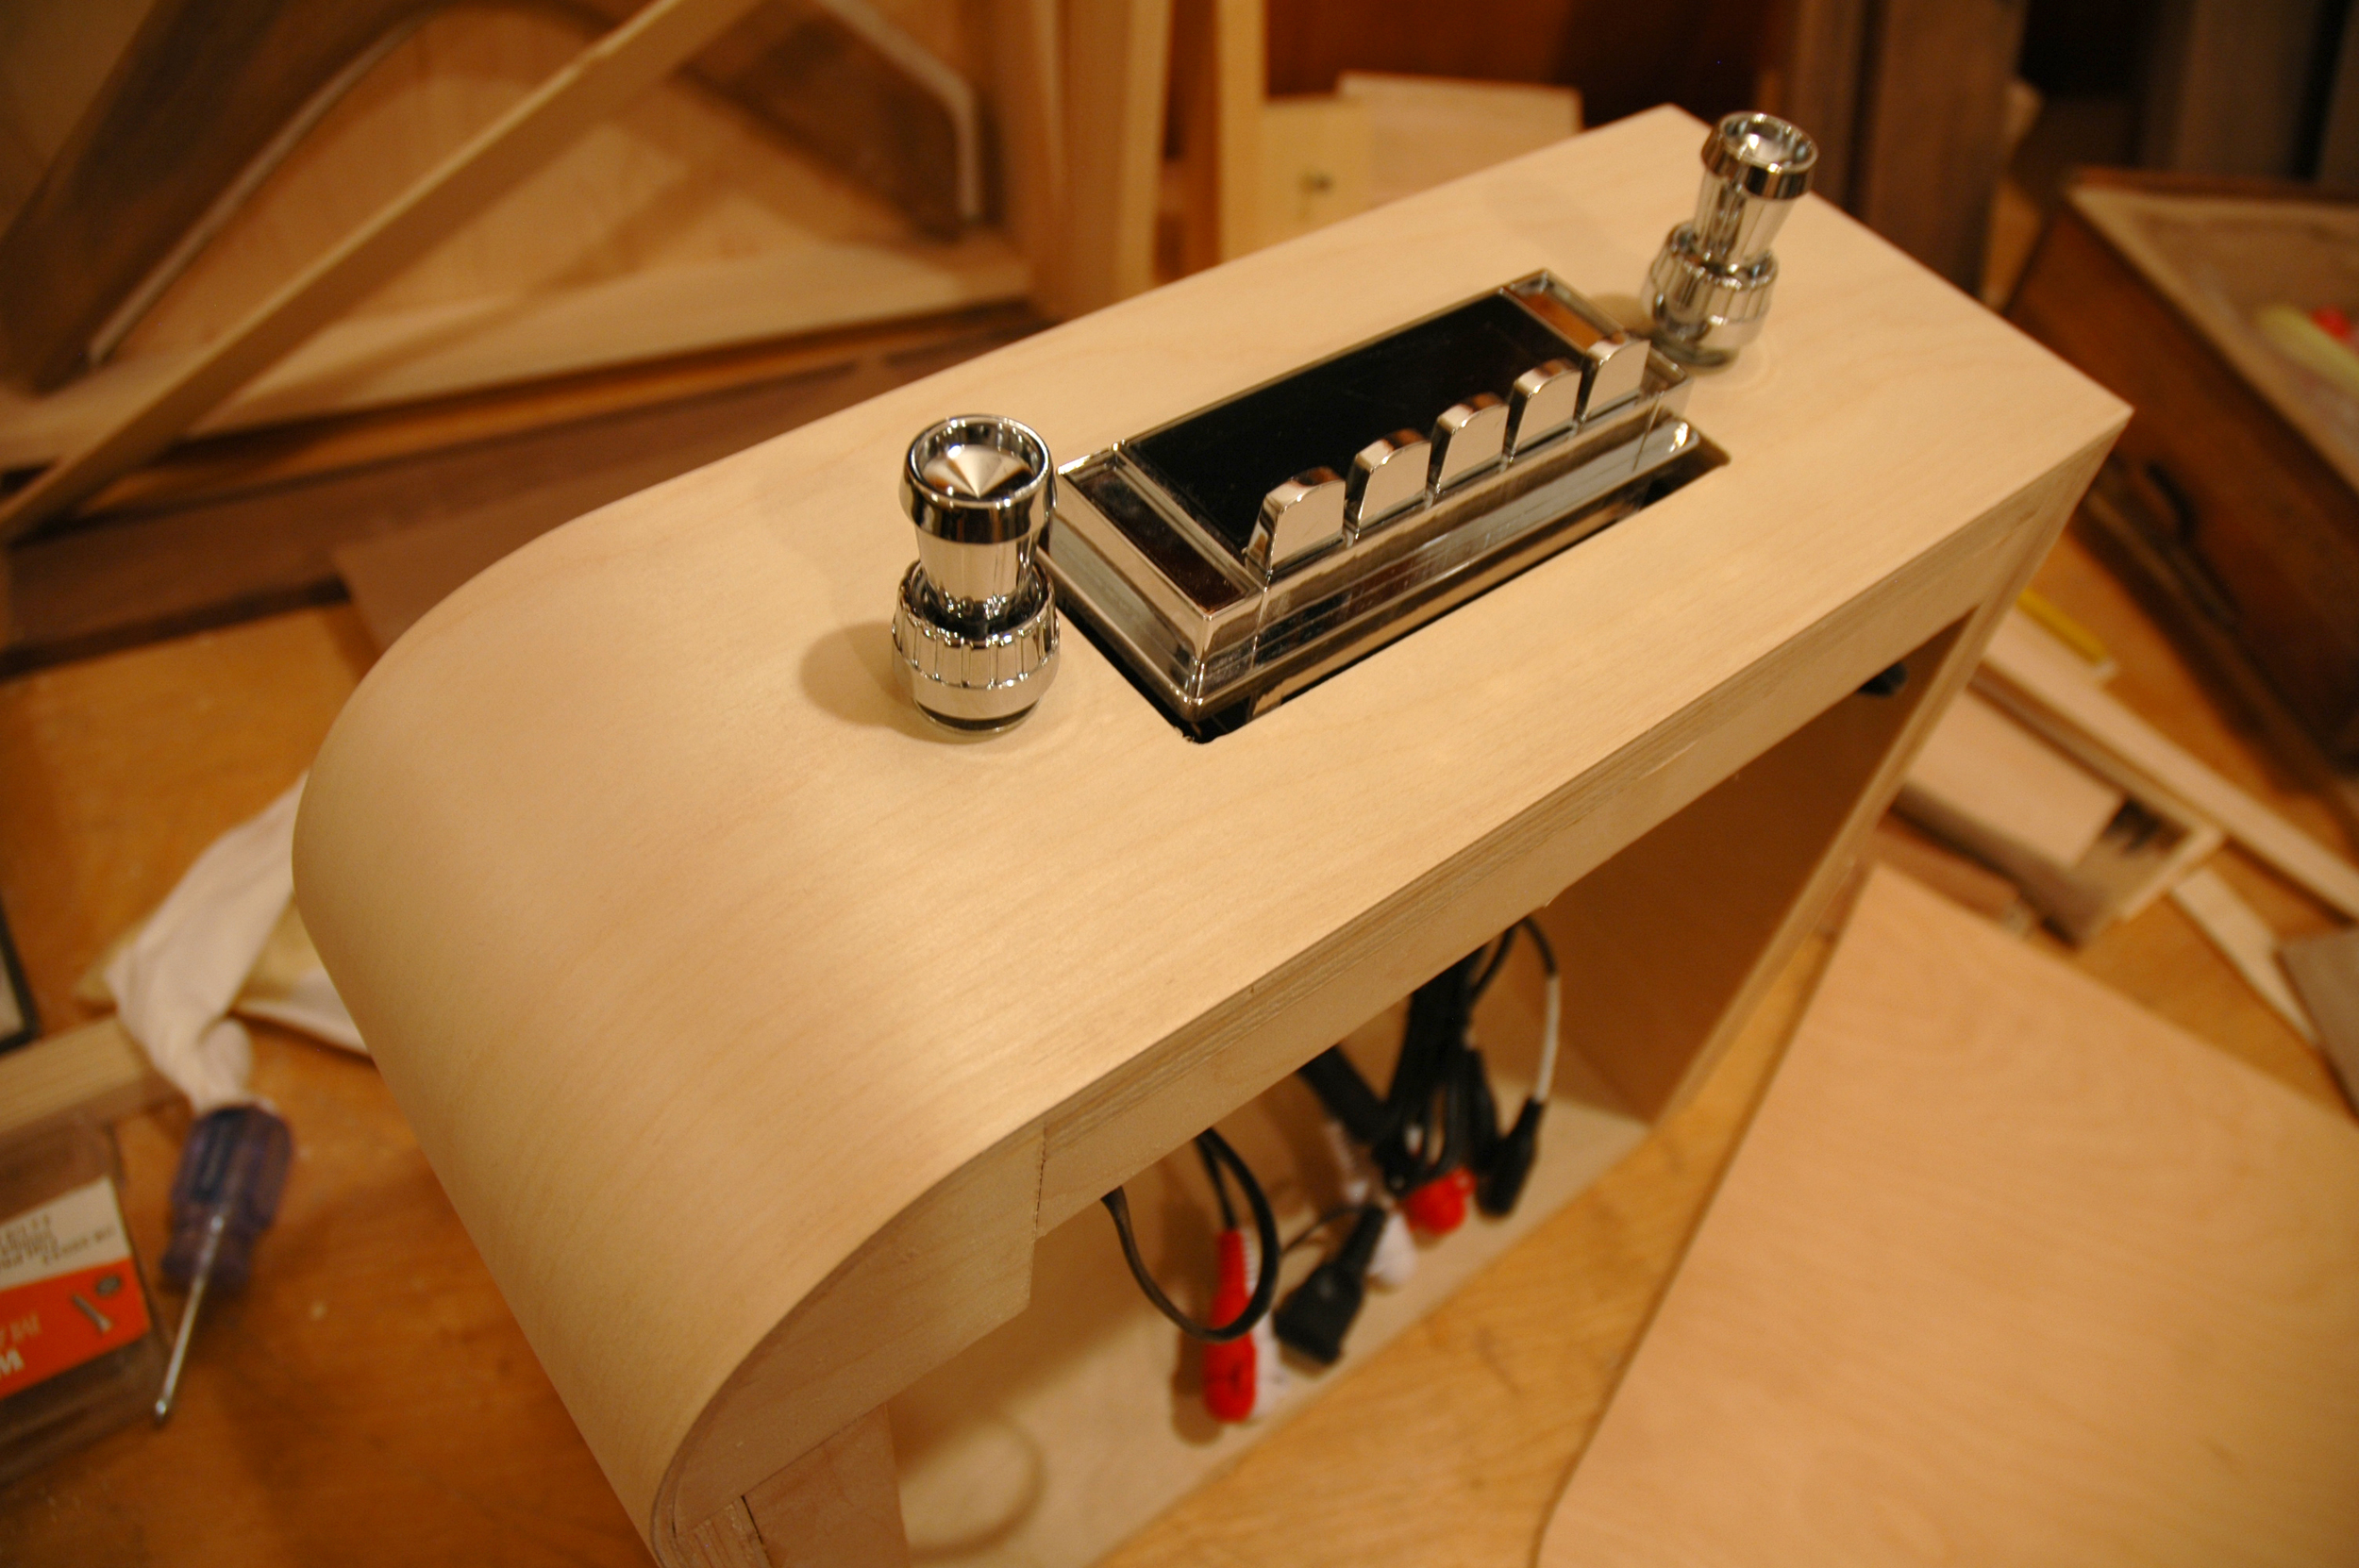
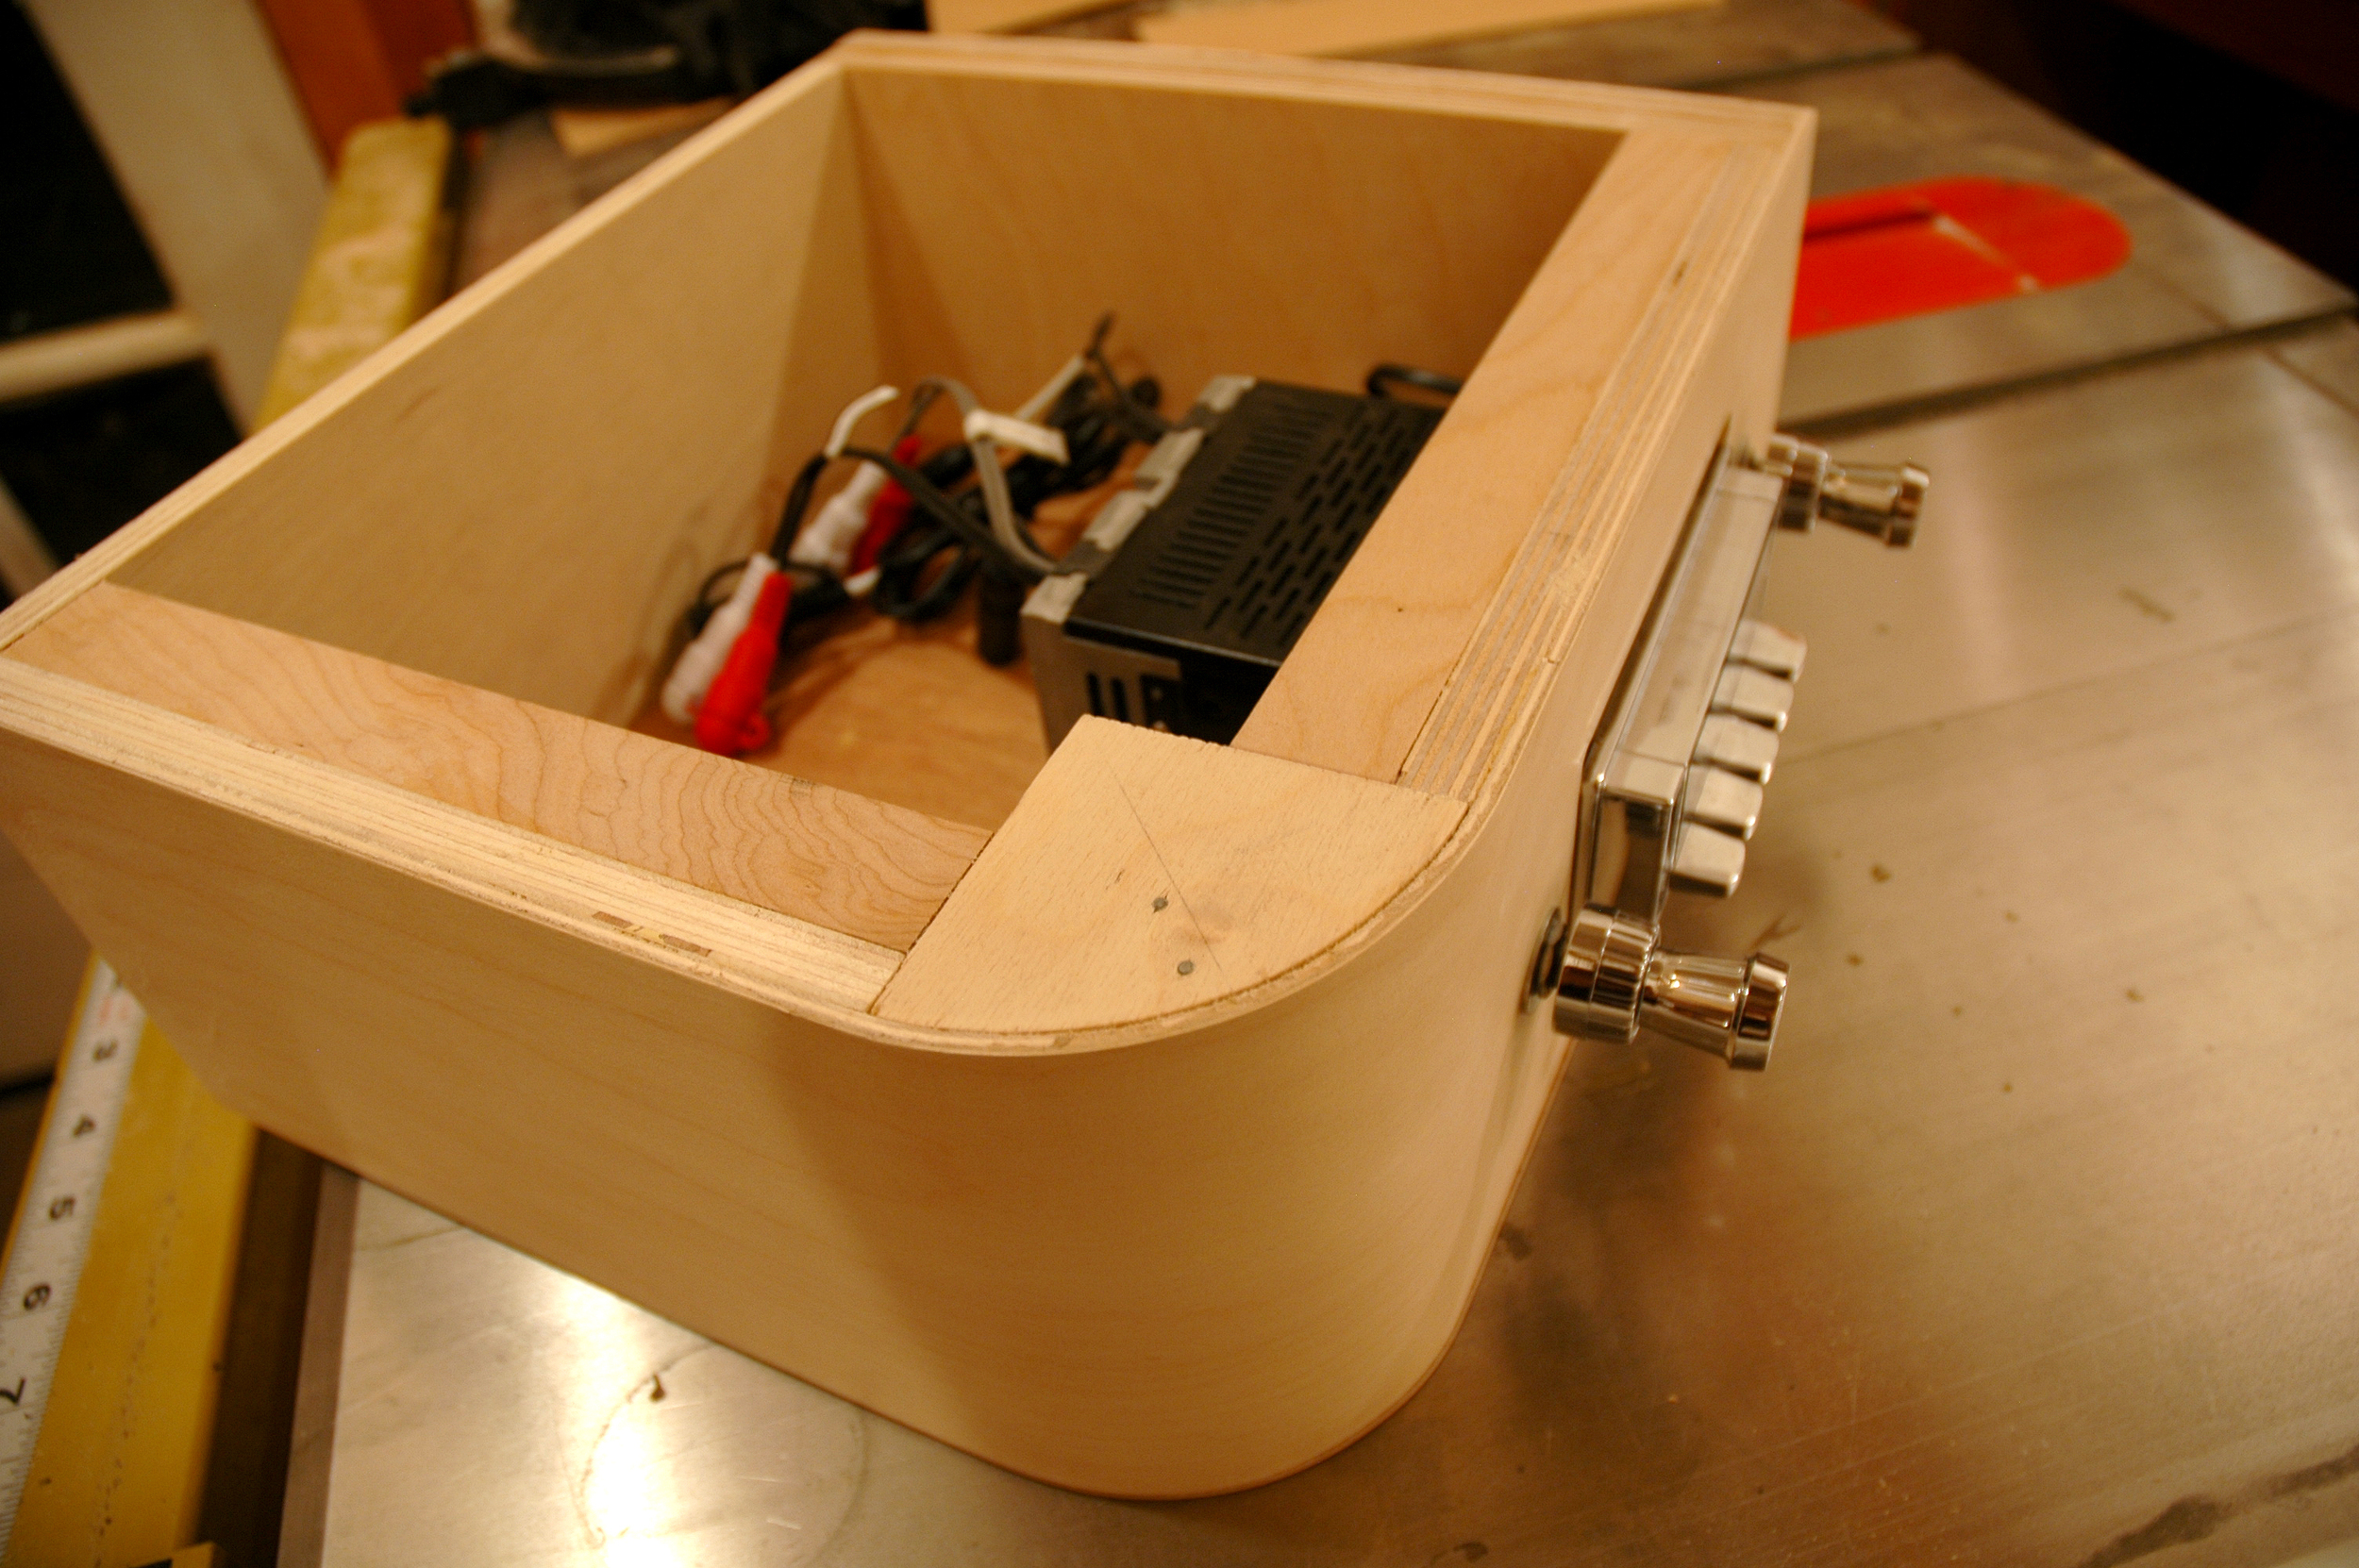
Stereo console for the Canned Ham

My friend Carl and I picked up a really cool vintage reproduction stereo from RetroSound that is true to the 50's style of our trailer but has modern features that allow us to plug in ipods and other digital crap. The console is bent birch veneer that matches the other cabinetry in the Canned Ham so it'll look factory-made but way more cool. We're installing it into the ceiling above the mini bar so it'll be nice and handy for picking out a good tune while mixing a cocktail.

I just need to finish up the walnut faceplate and we'll be in the entertainment business.

Nightstands continued

After having to take a short break from the modern nightstands I finally got some time to return to them and build out the drawers. Next the drawer fronts will get attached and then I can move on to applying the finish. And then finally, load 'em up and haul 'em to Puget Sound.

NightstandDovetails1.jpg